Start Hiking on a Budget
How to break into the often expensive world of outdoor adventures, without breaking the bank.
Building Your Gear Arsenal
I’ve been backpacking for almost 17 years and camping even longer. That’s plenty of time to gradually piece together an impressive arsenal of gear. Trying to purchase all this equipment before your first outing isn’t practical, sensible, or even possible for most hikers.
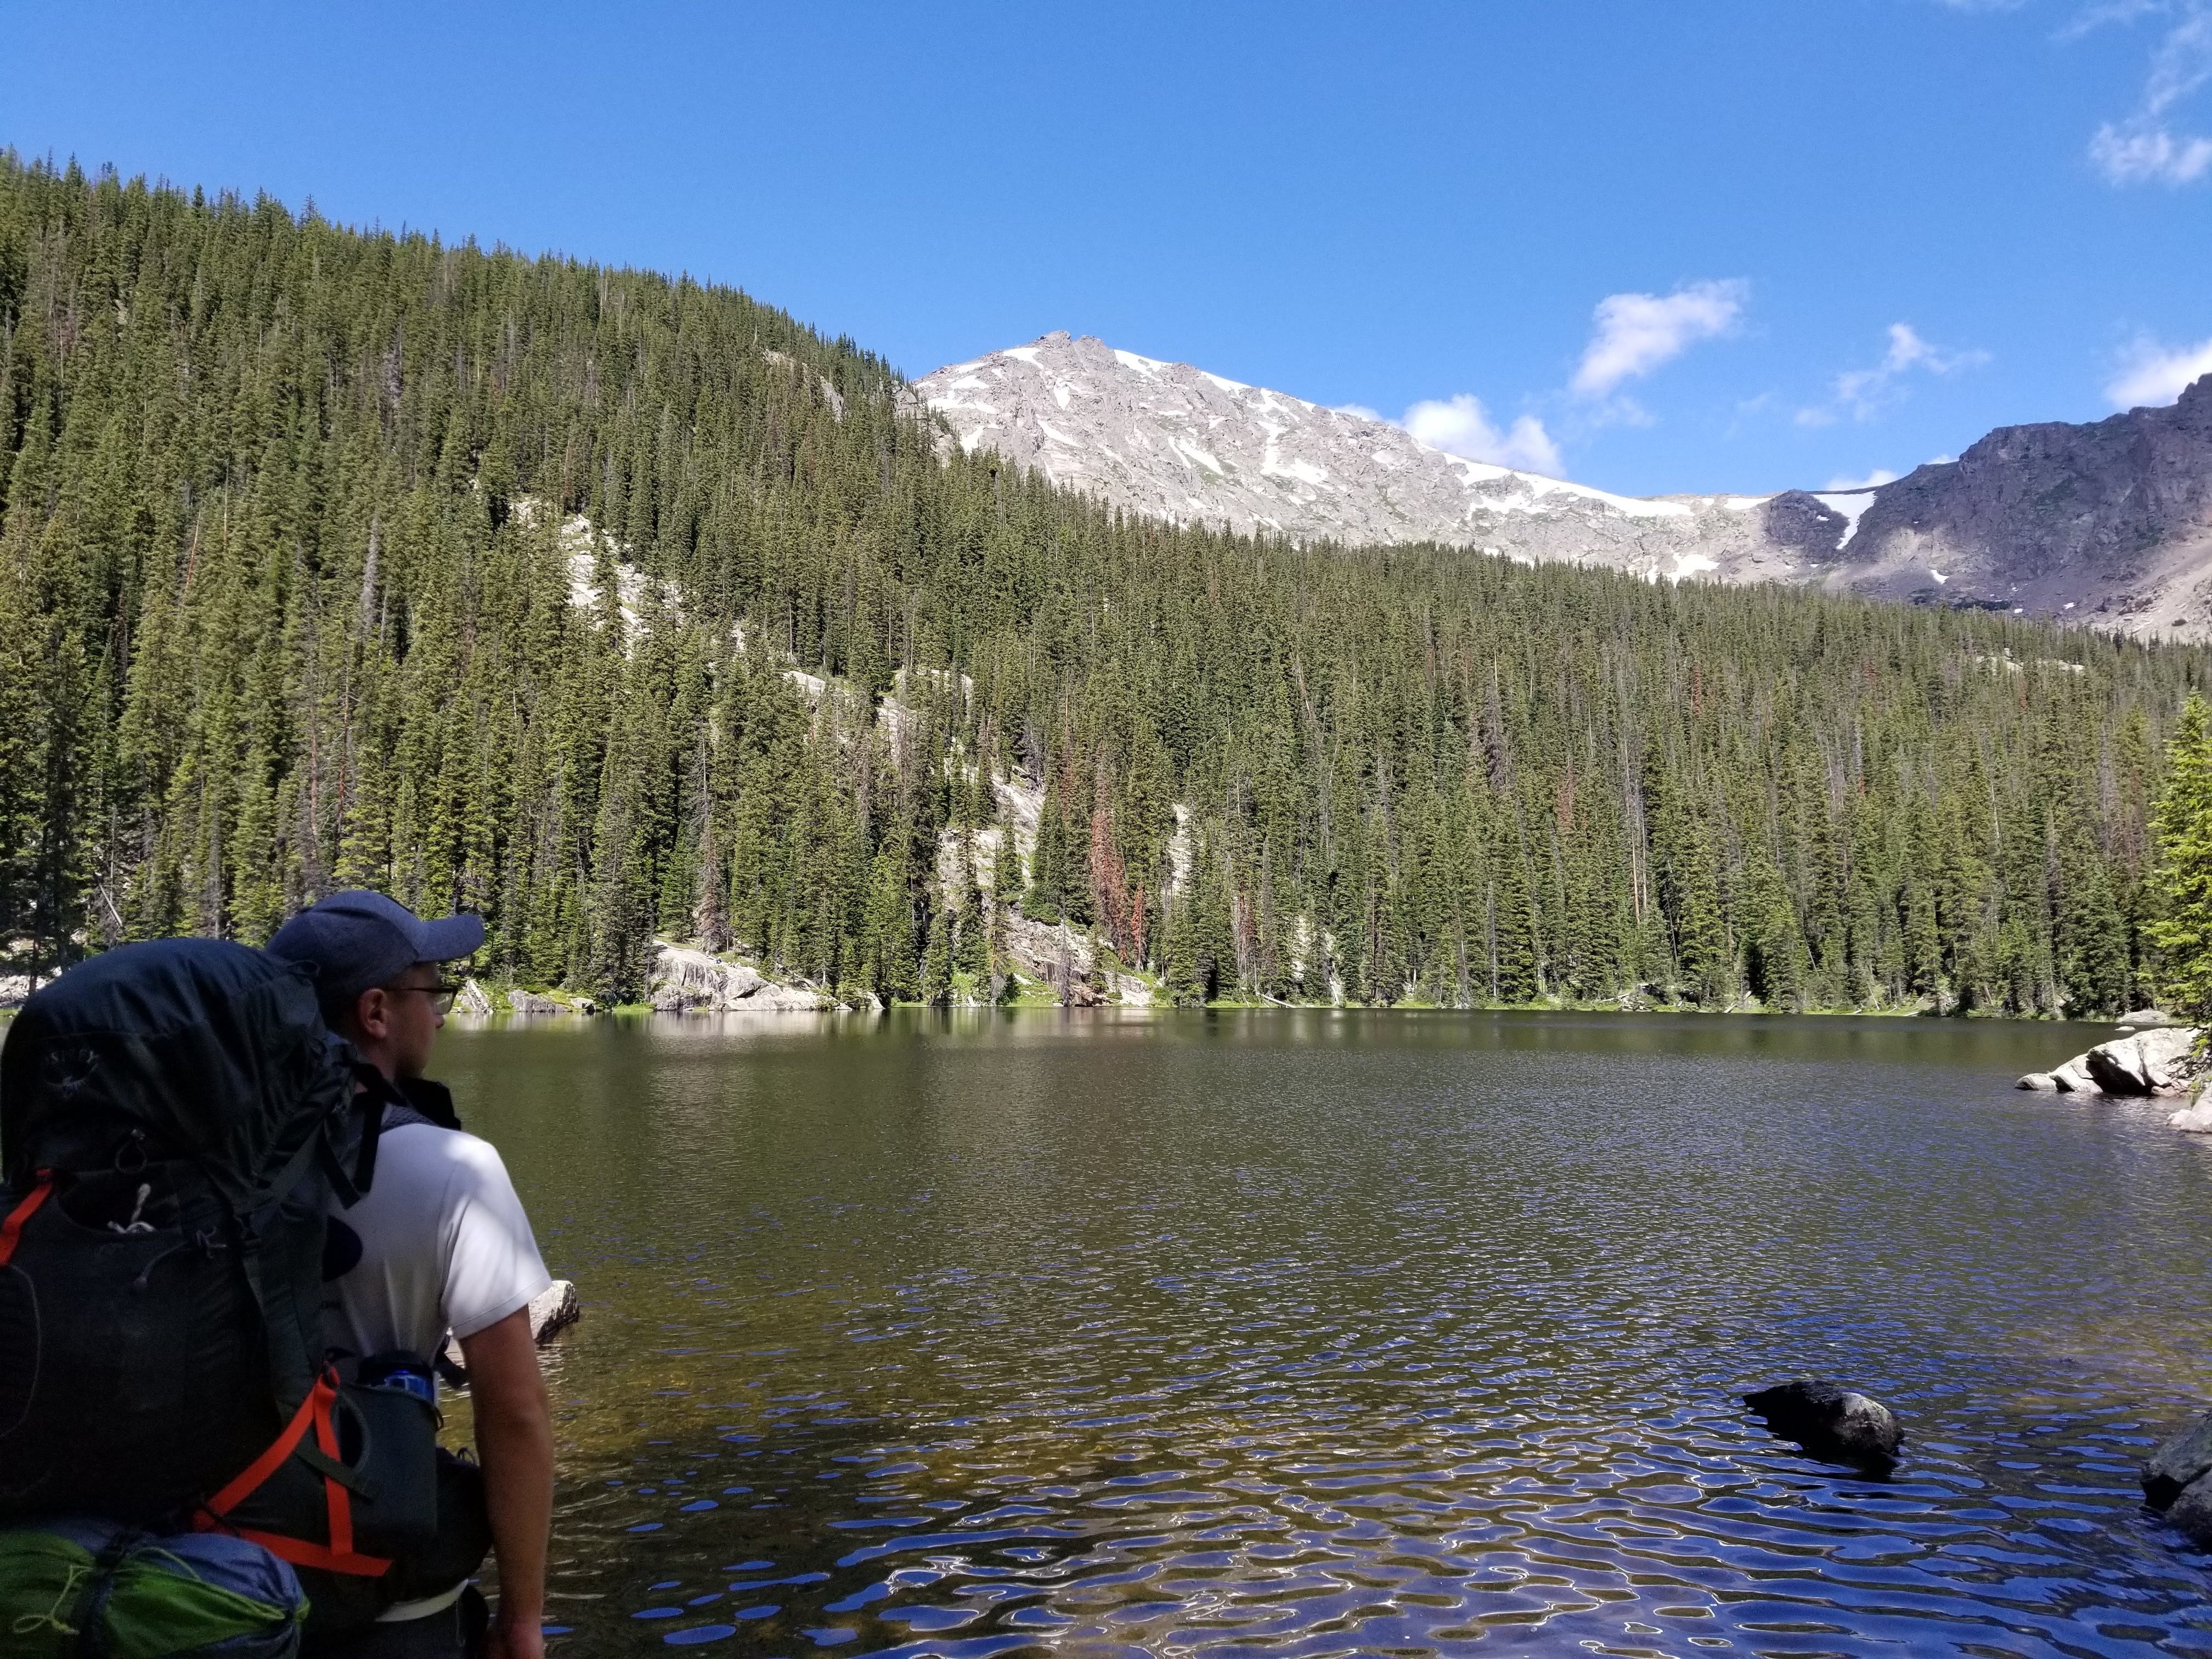
You may notice in the photo above, just how much gear is in and on my backpack. Luckily, you don’t need that much equipment to start enjoying the outdoors.
It’s Easy to Overspend. Don’t.
In our world of high-performance fabrics and ultra-light materials, it’s easy to drop $300 on a backpack, $500 on a tent, or $800 on a sleeping bag.
With that in mind: how does someone still testing the waters go about getting their gear, without making a herculean financial commitment?
First: avoid the temptation to pick up the cheapest equipment you can find. Bad gear is more likely to leave you high and dry — or in a more literal sense, low and damp — on the trail. You’re not going to enjoy your first trip if you’re blistered, cold, or stranded.
Besides, if you do stick with the sport, you’ll wind up spending more money to replace the low-quality items that never worked in the first place.
You should strive to get the best gear that you realistically need, that’s in your budget. It’s possible to go overboard. Ultra-high end equipment isn’t necessary until you start high-mileage backpacking trips. At that point, you’ll be counting the ounces in your pack. Then, you may be willing to spend an extra hundred for a tent that’s one pound lighter.
Still: you want something that can get the job done. Treat it right, and it will last you for years. Some gear — a lifetime.
Your Ideal Mindset for Shopping
We’re not just searching for low prices here. First we need to know what we’re shopping for, what we can improvise, and what can be bought later. If you’re just jumping in, your first trip doesn’t need to be a multi-day trek. You can also do a bit of planning around the weather to avoid uncomfortable extremes.
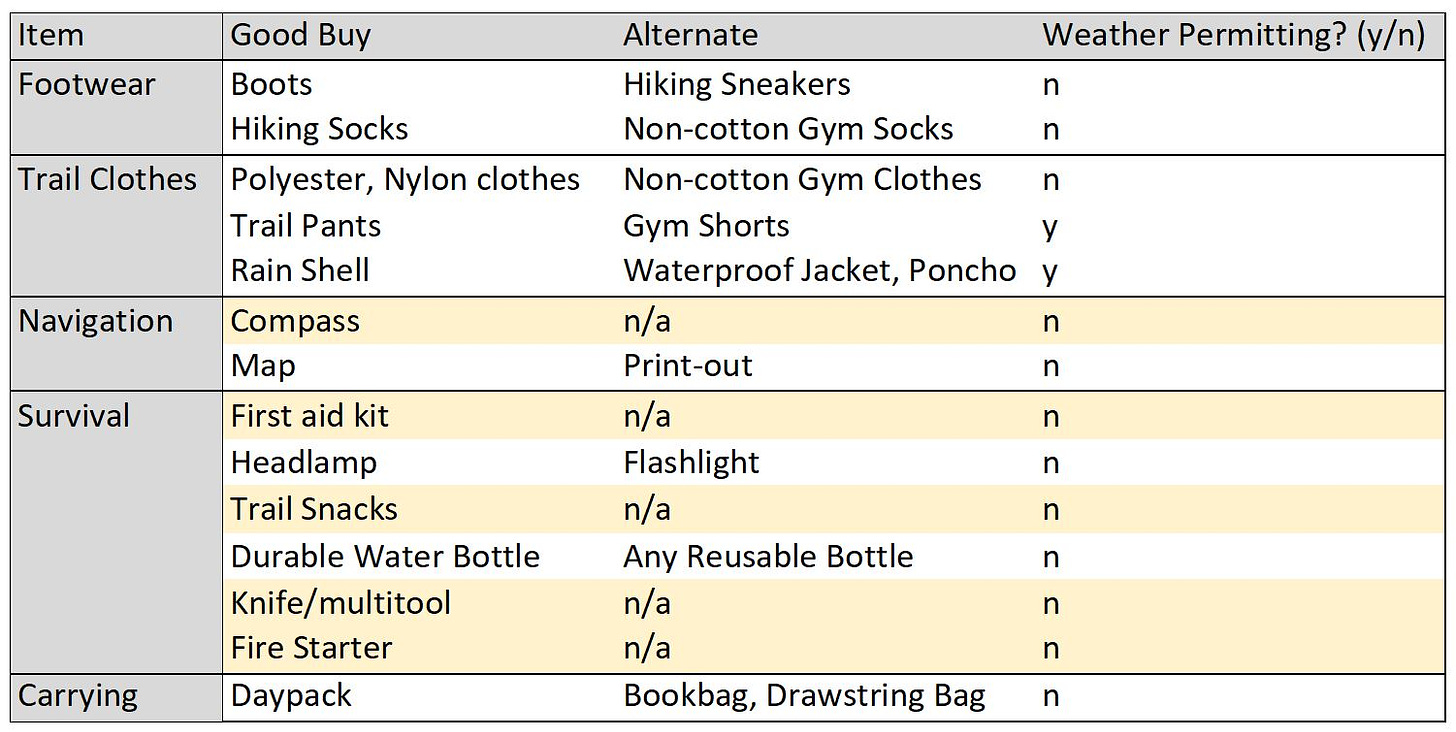
I’ve put together a handy list, which should give you a good overview. This table also contains substitutes for a lot of the preferred items. These are things that quite a few of you will already own. A couple items are also weather-permitting. Depending on where you live and what day you hike, you may actually be able to go without them.
Notice a pattern? You may have a suitable alternative for a lot of these items already, which means you’re almost trail ready! The items I consider non-negotiable are altogether less than $60 altogether, will actually save your life, and are worth every penny. I’ve highlighted them in the table above.
If you’d like to go buy them now, here’s the short list:
Trail snacks can be anything to munch on while you walk, and are available at almost every grocery store. Things like beef jerky or granola bars are classic staples.
It’s similar to the 10 essentials list from the Alpine Rescue Team. If you’re looking for more information before heading out, they have other excellent educational resources.
Granted, these things alone won’t let you stay overnight, or hike in cold or adverse weather. But it will get you far enough to see if you’d like to invest more in the sport.
In our next steps, we’ll determine if the gear you have is up to the task, or if it will make you miserable on the trail. We’ll also look at some thrifty tricks to help you save in the long run, and great first-additions to your gear closet.
First Buy: REI Co-op Membership — $20
My first recommendation isn’t actually a piece of gear, it’s a lifetime membership at REI. It will set you back $20, but pay for itself on your very first trip. REI is not the only place I get my outdoor gear. Some of it tends to be a bit overpriced. But for a new hiker there are huge benefits.
The Member Dividend
Each March, REI issues you a gift card worth 10% of all non-sale item purchases you made there, the previous year.
Good Advice
Staff are pretty knowledgeable. When you’re new, that’s a huge help in finding the right gear for what you need.
The Rentals
The best part of the membership actually comes not from what you can buy, but what you can borrow. REI’s gear rental system is a great way to sample sports and experiences you’re not ready to fully commit your finances to.
You can get kits containing all the essentials for an outing. For example members can get a backpacking kit for $137. It includes all the basics for two people. You could easily blow an entire paycheck buying that much gear outright!
When you’re more experienced, this is also a great way to rent equipment you’ll occasionally, but not enough to buy or find a place to store.
You can rent without a membership. But you’ll be charged significantly higher rates — more than the value of a co-op — and be required to pay an expensive deposit on higher tier items.
This is the full catalogue, if you’d like to peruse.
Footwear — $100-180
Probably the single biggest determining factor in whether you’ll be comfortable, have a fun hike, and come back for more, is your footwear. This option is also pretty hard to nail down in terms of cost.
Possible Alternative
Don’t head to the store just yet. You may be able to get by with a decent pair of running sneakers. If you’re planning to enjoy shorter, warm weather hikes or walks on stable ground: you can probably hold off on buying the boots for now. Just make sure your shoes have a solid, deep tread to maintain your footing.
These should also be waterproof. Even if you hike on a sunny day, you still might find muddy spots, or stream crossings. You could technically treat a pair of sneakers with waterproofing spray for less than $20. But in my view, that’s $20 you could be spending on good boots.
When to Upgrade
You’ll probably need a pair of boots as you tackle more aggressive, unstable terrain. Boots provide more ankle support, which you’ll be thankful for during scrambles, or crossing scree fields. They’re also a must-have for cold weather.
What to Look for
Go in person to try these on. I rock a pair of Salomon’s, but your foot may be shaped differently. No matter what brand you buy, look for a version with Gore-Tex.1 Unlike standard waterproofing, Gore-Tex is breathable. Liquid water can’t get in. Water vapor can get out. This means you can keep your feet dry, without marinating them in your sweat.
This feature costs more. But trust me: you DO NOT want to skimp here. Cheap boots mean blistered, achy, wet feet — even frostbite if you’re hiking in the winter. I also would advise against looking for a pair of used boots. You want footwear that’s broken-in to your feet, not someone else’s.
Don’t forget a good pair of hiking socks — Wool, polyester, or nylon. Cotton is rotten. Mine cost me $20.
Trail Clothes — $60-90
I’m almost certain you have some kind of workout attire somewhere, and those will suit you just fine for a while. Any gym shirt/shorts/pants will do, provided they’re not made from cotton.2 Bring a warm over-layer too. Even if the weather is comfortable when you begin hiking, you’ll be happy for the warmth if your trip runs long.
More good news: you only really need one good set; it’s not like you’ll be wearing them daily.
You’ll need more advanced layering to survive the cold — that’s something I plan to address in a future post — but if you’re just getting into the sport, winter hikes pose a whole host of other challenges. I’d stick to summer, spring, and fall recreation for now. It’s worth kicking that can down the road until you’re more established.
What to Look for
If you’re determined to make some kind of upgrade though, I’d spend this money on a good pair of hiking pants. These offer a bit of protection for your legs when pokey vegetation encroaches on the trail, or you take a tumble on a rock scramble. Fewer scrapes means more good days.
Plus: when you’re waking up for an early start, even the summer months get a bit nippy. I personally use these pants from Prana. They’re a bit steep at $90. But they’re breathable, stretchy, fast-drying, and durable. That means they’ll last you a long time. Remember what I said at the beginning: we’re focused on getting only the gear we need… but at high quality.
Rain Shell — $45-90
This one is regional. If you live in a place that sees infrequent or predictable rainstorms, you honestly don’t have to worry on short, local hikes. I don’t always pack mine.
The second you start staying overnight, or hiking longer distances, this is an absolute must-buy. If you already have a rain coat in your closet, fantastic. That’ll probably do.
If not, you can get a disposable poncho for less than a dollar. They won’t be durable, but you’ll be dry. Many experienced hikers I know still keep a one of these in their pack, because they have some creative uses in emergencies. Do not go out without at least one of these options.
As you get more serious though, a quality rain shell should be a priority to upgrade.
I own a Marmot jacket. But these can get a bit out of control price-wise. You’re paying extra to get a jacket that’s ultra-lightweight, and that may be overkill for you. This layer from Columbia is still a great option.
Navigation — $10-30
No matter how well marked or high-traffic a trail is: you need a way to find your way back if you make a wrong turn. That means a compass, and map of the local area. Cell phone apps do not count.
As far as compasses go, this price range ensures you’re getting something reliable without overpaying for stuff you don’t need. This model from Suunto is a solid option. Whatever you do buy3, I always prefer a clear compass. I find it’s easy to use some of their other features.
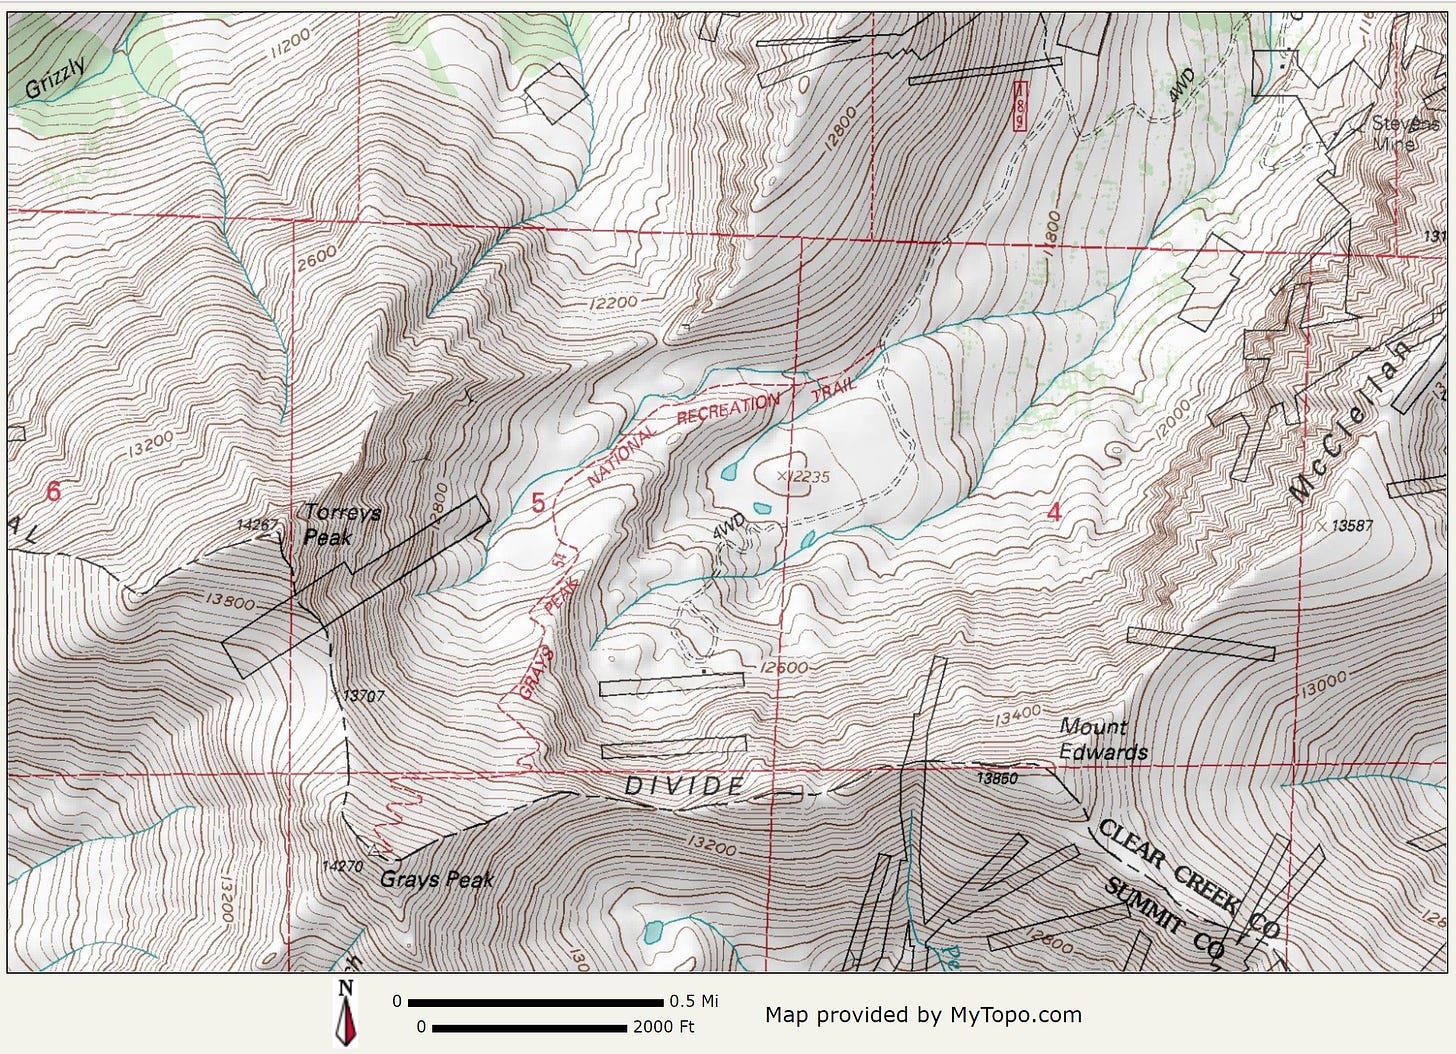
In terms of maps: I recommend you print your own instead of buying a fold-out one. Those take up more space than your kitchen table, and — unless you’re hiking cross country — you only ever wind up needing one panel.
You can use this site to generate your own free map of the specific trail you want to tackle.
Stick the print-out in a Ziploc bag to protect against the elements. A torn, soaked map is almost as bad as not having one at all.
Survival — $20-50
Even if you plan on hiking during the day, you’ll be glad you have a flashlight if your trip runs long and the sun goes down.
I’m almost positive you have a flashlight somewhere in your house. If for some reason you don’t and you’d have to go out and buy one, I’d just get a headlamp instead. These start at less than $20, and leave your hands free.
Flashlights work in a pinch. But if you’re planning on hiking in the dark — say a pre-dawn start so you can reach the summit early — then a headlamp gets bumped into the must-buy category on my chart.
True Worst Case Scenario Gear — $30-60
Despite your best attempts at navigation, getting lost, or even stuck is something you should be prepared for. Even if you call for help4, perish the thought of a helicopter rescue. 99% of the time, a team of volunteers will be hiking to your location. They’ll be bringing heavy equipment, too. That means help is hours, not minutes away.
That means you should have a few other critical care items on hand:
A reliable fire starter that isn’t dependent on fuel, electricity, or being dry. Flint and steel kits are cheap and reliable
An emergency blanket to trap your body heat, and block wind, rain, and snow. These are light weight, and have many uses in survival situations
A knife or multi-tool. These vary wildly in prices depending on the features you want
A first aid kit with a waterproof casing like this one. Soggy bandages are useless
Whatever you buy, familiarize yourself with this emergency kit; it could save your life, but only if you know how to use it.
Daypack — $60-160
This appears last on my list because on a short trip, you can probably throw all the previous items in a drawstring bag, or old backpack you have lying around the house.
This is going to be a case of long-term comfort. A good daypack ensures your back is comfortable, and that your hips are doing most of the work holding up your burden.
On the higher end of this price range, you’ll get features that enable you to hike more efficiently and with fewer breaks.
Hydration bladders that allow you to drink without digging out your water bottle
Hip-holster pockets for snacks, compass, maps, etc.
Lighter pack weight
Increased carrying capacity
Before You Buy
Keep in mind, this is far from a necessary requirement to start hiking. I still do not have a devoted pack for short hikes. Instead, I use a second-hand LL Bean backpack. Anything longer, I’ll switch to my full-sized Osprey Atmos — the same one I use for overnights in the backcountry.
This question will largely depend on what equipment you already have access to.
What to Look For
If you’re looking to purchase a great daypack and are thinking of making a longer-term investment: Osprey makes great gear, and stands behind their products.
You can also look for gently used packs in a few different places. REI’s Co-op gives you access to a member-only part of the store called “The Garage.” This lets you purchase heavily discounted used equipment.
There are entire websites devoted to this as well. Outdoor Gear Exchange is a great example.
Recap
Getting into hiking can seem overwhelming. The good news is: you don’t need to buy everything at once. Use this guide as a road map to put together the absolute essentials, as you need them. You’ll be well on your way to having a collection of great gear that will last you a lifetime.
I Want to Hear from You
What piece of outdoor gear do you get the most out of?
You can also ask any specific gear questions you like — don’t be shy! I’ll get back to you as soon as I can.
There are some proprietary alternatives to Gore-Tex. I still prefer this one though.
Cotton absorbs sweat and will not dry properly on the trail.
Make sure you buy a compass for the correct hemisphere. It has to do with how the needle is weighted: Northern compasses won’t work south of the equator and vice-versa.
Always let someone know where you are, the route you’re taking, and when you should be back. In the event you can’t call for rescue, no one will come for you until someone notices you’re gone.



I love this guide! I couldn't agree more on the daypack recommendation. My Osprey daypack is one of the best purchases I've ever made and is a massive improvement over the drawstring bad I was using previously.
Thank you for sharing your tips.